Working with Shapes, Graphics,
and Other Objects

Chapter 9
Working with Shapes, Graphics, and Other Objects
195
Drag a file from the Finder.
m
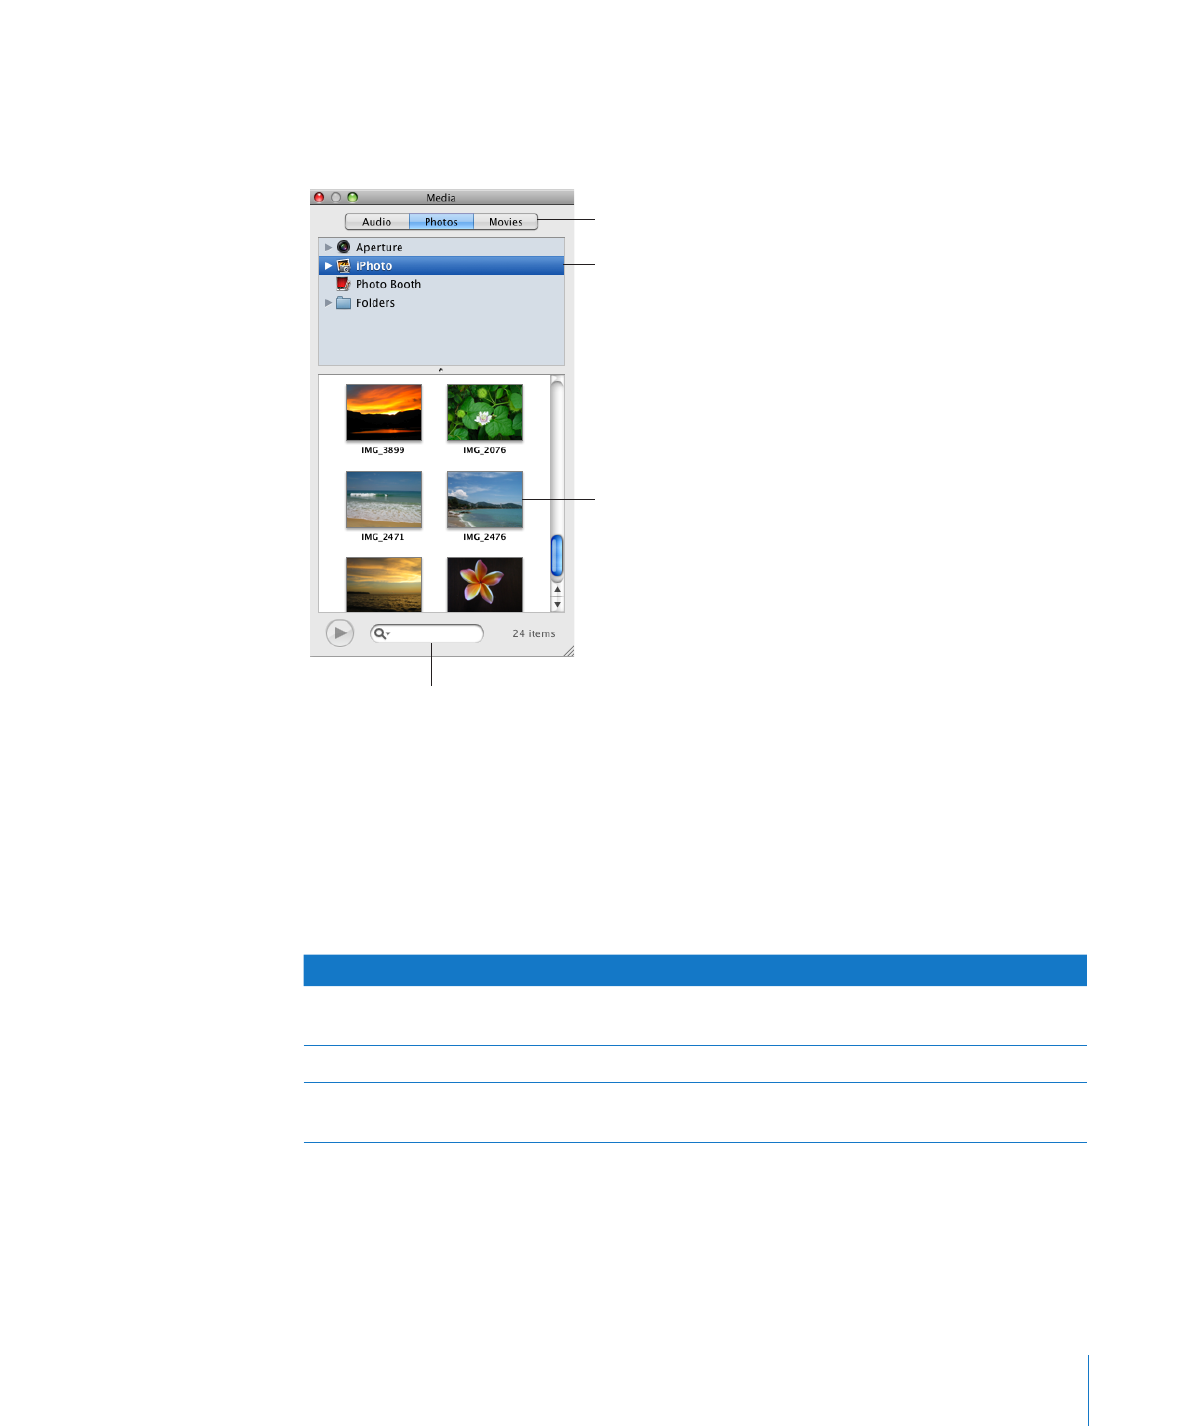
Click Media in the toolbar, click Photos in the Media Browser, select the album where
m
your picture is located, and then drag a thumbnail to position it where you want it.
Second, choose a source.
First, click a button to go to
your media files.
Third, drag an item to the
document or to an image
well in one of the inspectors.
Search for a file by typing
its name here.
The buttons at the top of the Media Browser give you access to images in your iPhoto
library, movies in your Movies folder, or audio files in your iTunes library.
Drag a file from another application.
m
After importing your image, you can drag it to position it wherever you want on
a sheet. You can use the tools in Numbers to mask (crop) an image; change its
brightness, contrast, and other image qualities; or erase its background.
To learn how to
Go to
Replace image and other placeholders in
templates with your own objects
“Replacing Template Images with Your Own
Images” on page 196
Mask images to get rid of unwanted parts
“Masking (Cropping) Images” on page 196
Reduce the size of your spreadsheet by saving
only the used portion of masked images
“Reducing Image File Sizes” on page 198

To learn how to
Go to
Make parts of an image transparent in order to
remove the image background
“Removing the Background or Unwanted
Elements from an Image” on page 198
Improve the quality of images and create
interesting visual effects
“Changing an Image’s Brightness, Contrast, and
Other Settings” on page 199
Place, align, resize, and reformat images
“Manipulating, Arranging, and Changing the Look
of Objects” on page 212
Add an equation you can manipulate like an
image
“Working with MathType” on page 230